之前发布了ccapV0.1版本,让node可以很轻松的生产之前需要安装许多图片依赖库的验证码,由于CImg库原生只支持bmp等未压缩格式,所以体积比较大,可以说ccap模块之前还不是很完善,虽然可以安装jpeg库然后修改binding.gyp文件之后rebuild实现jpeg的验证码生产,但是还是比较麻烦。
于是我就想将jpeg的库封装或者预装到ccap模块,让用户不用再麻烦的去安装第三方的jpeg库。
这里我选择jpeg库是libjpeg库,地址:http://libjpeg.sourceforge.net/
C++的图形开源库CImg地址:http://cimg.sourceforge.net/
不过很遗憾告诉windows用户,目前我还没写windows下的libjpeg库支持,所以windows用户目前还是只能使用bmp图片作为验证码,linux用户默认使用jpeg图片作为验证码的生产格式。
安装方式还是不变:
npm install ccap
github源代码:https://github.com/DoubleSpout/ccap
在我预装libjpeg库到ccap模块时,主要遇到了下面几个问题:
1、如何在node-gyp rebuild之前为linux系统安装libjpeg库
2、如何通过命令行安装libjpeg库
3、如何区分不同系统的编译选项,保证windows下使用bmp,linux下使用jpeg
问题1、我们来看下package.json下的scripts属性:
scripts:{
“install” : “node-gyp rebuild”
}
在npmjs.org文档上有详细说明:
1 | prepublish: Run BEFORE the package is published. (Also run on local npm install without any arguments.) |
我们可以看到scripts属性有以上这么多选项可选择,我们着重看下preinstall属性,它表示在此模块安装前运行,于是我就打算设定一个preinstall属性用来运行脚本,预安装libjpeg库。问题1我们圆满解决了。
问题2、我们在package.json文件中,加入了一行如下代码,在安装模块之前,运行js脚本,这个脚本是用来使用命令行安装libjpeg库:1
2
3
4"scripts": {
"preinstall":"node make.js",
"install": "node-gyp rebuild"
},
安装libjpeg库很简单,从官网wget压缩包后,tar之后,分别运行./configure和make、make install命令即可默认安装libjpeg库。于是我们通过node手册找到如下代码是运行命令的代码:1
var spawn = require('child_process').spawn;
但是问题出现了,不管./configure还是make都需要进入指定目录之后运行的,通过查看帮助发现./configure 命令可以设置–srcdir=XXX绑定指定路径,而make命令通过-C XXX绑定指定路径,但是实际在我的centos虚拟机上发现设置./configure –srcdir=xxx无效,无比郁闷,仔细翻阅node手册发现spawn命令有一个相当好用的设置,cwd属性,可以设置该命令的目录,比如我们要执行ls命令,并且在/usr/local目录下执行,于是下面2段代码是等价的。
1 | var spawn = require('child_process').spawn, |
等同于
1 | var spawn = require('child_process').spawn, |
于是我们的问题迎刃而解了,只需要在执行命令的时候设置一下cwd环境变量即可,同时要注意,当没有命令参数时,也必须加上[]作为空参数传递。
问题3、由于windows下安装libjpeg和linux下流程不同,当然命令也不同,所以必须分别处理,而我目前还没有支持windows,所以我们必须分别处理windows和linux下的编译选项。
打开github的node-gyp主页,查看说明文档,我们只需要将条件和编译选项加入到binding.gyp文件即可,看代码片段如下:
1 | "conditions": [ |
当os为win时,我们将依赖的库libraries数组设置为空,同时去掉了CImg的编译参数”-Dcimg_use_jpeg”,这样我们就顺利的让linux使用jpeg而windows使用了bmp。
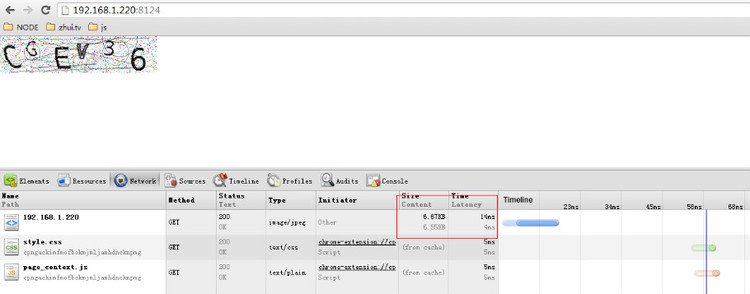
使用了jpeg的验证码彻底瘦身了,从45KB,变成了6.6KB
注意:
A\以下错误是系统时间不对,或者是没有正确执行node-gyp configure
1 | make: Entering directory `/usr/local/nodejs/node_modules/ccap/build' |
B\如果出现以下错误,可能你的系统之前有安装过libjpeg,但是是旧版本的,只需要删除旧版,重新安装即可:
Wrong JPEG library version: library is 62, caller expects 80
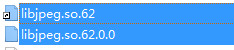
删除原来libjpeg.so.62,然后执行:
ln -s /usr/local/lib/libjpeg.so.8 /usr/lib/libjpeg.so.8
C\如果出现以下错误,说明连接有误:
1 | Error: libjpeg.so.8: cannot open shared object file: No such file or directory |
手动执行如下命令即可,将lib配置文件写入即可
1 | echo /usr/local/lib >> /etc/ld.so.conf ldconfig |
热烈欢迎各位安装使用,如果在安装过程中有任何错误和问题,真诚的希望能回帖告诉我,我会及时修复。